If you’re running more than one Minecraft server on the same host, you know the pain: secondary servers need custom ports, and asking players to remember yourserver.com:25566 is a terrible user experience. SRV records fix this.
The Problem
You’ve got a machine running two Minecraft servers:
- Server 1 (main): Port 25565 →
play.yourdomain.comworks fine - Server 2 (creative): Port 25566 → Players have to type
play.yourdomain.com:25566
Nobody remembers port numbers. Half your players will forget the :25566 part, connect to the wrong server, and message you asking why their creative world is gone.
Why SRV Records Are Perfect for This
Minecraft’s built-in support for DNS SRV (Service) records lets you map subdomains to specific ports. Instead of making players remember ports, you give them clean addresses:
survival.yourdomain.com→ connects to port 25565creative.yourdomain.com→ connects to port 25566modded.yourdomain.com→ connects to port 25567
Players just type the subdomain. No ports. No confusion.
Prerequisites
You’ll need:
- A domain name (GoDaddy, Cloudflare, Namecheap, whatever)
- DNS management access (zone file editor)
- Multiple Minecraft servers already running on different ports
- 10 minutes
Note: This works for Minecraft Java Edition. Bedrock Edition has limited SRV support depending on platform.
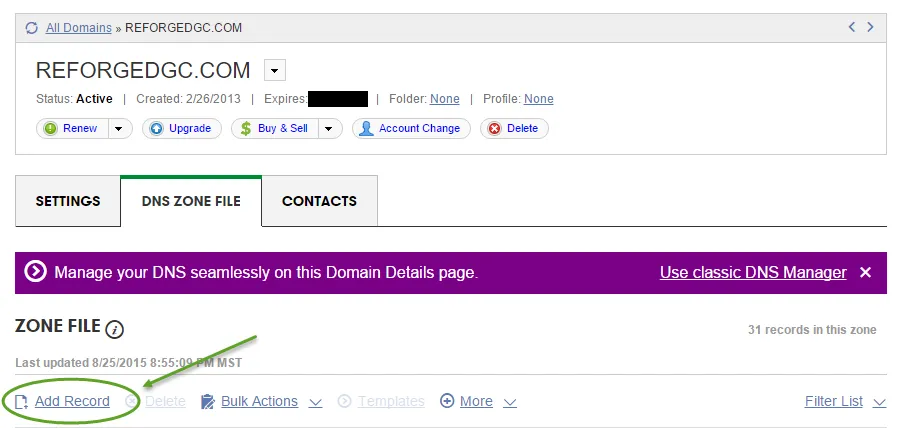
The Solution: Configure DNS SRV Records
Step 1: Create A Records for Your Server
First, set up a standard A record pointing to your server’s IP:
| Type | Name | Value | TTL |
|---|---|---|---|
| A | play | 123.45.67.89 | 3600 |
This creates play.yourdomain.com that resolves to your server.
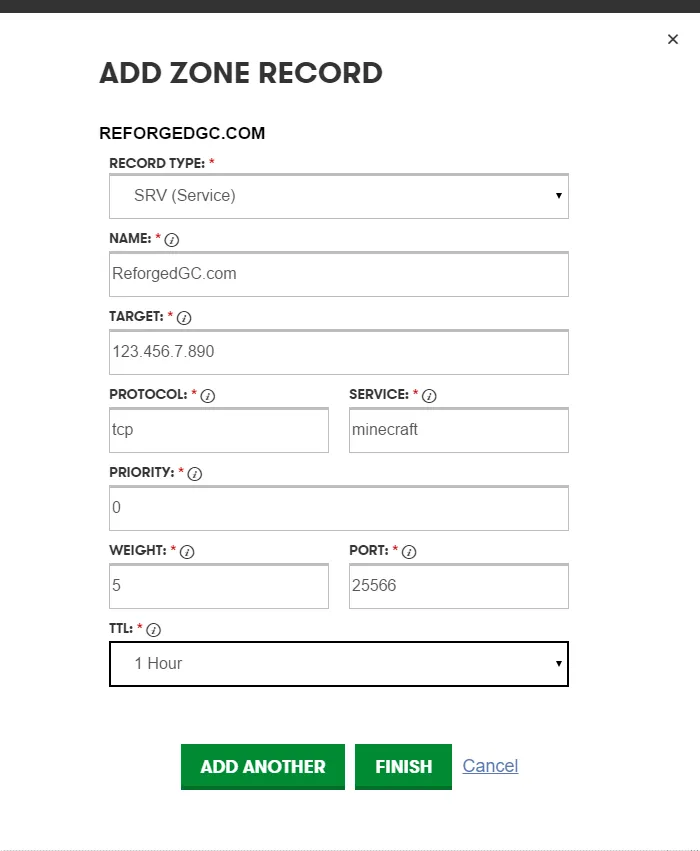
Step 2: Add SRV Records for Each Server
Now for the magic. Create an SRV record for each Minecraft server:
For your creative server on port 25566:
| Type | Name | Priority | Weight | Port | Target |
|---|---|---|---|---|---|
| SRV | _minecraft._tcp.creative | 0 | 5 | 25566 | play.yourdomain.com |
For your modded server on port 25567:
| Type | Name | Priority | Weight | Port | Target |
|---|---|---|---|---|---|
| SRV | _minecraft._tcp.modded | 0 | 5 | 25567 | play.yourdomain.com |
Field Breakdown
- Name: Must be
_minecraft._tcp.<subdomain>format - Priority:
0is fine (used for failover, not relevant here) - Weight:
5is standard (load balancing, also not relevant) - Port: The actual port your Minecraft server listens on
- Target: The A record (or IP) of your server
GoDaddy-Specific Steps
If you’re using GoDaddy (common for beginners):
- Log in → My Products → DNS
- Click “Add” → Select “SRV”
- Fill in:
- Service:
_minecraft - Protocol:
_tcp - Name: Your subdomain (e.g.,
creative) - Target: Your A record hostname
- Port: Server port (e.g.,
25566) - Priority:
0 - Weight:
5
- Service:
- Save
Cloudflare Note
Cloudflare’s free tier supports SRV records, but you may need to set the DNS record to “DNS only” (gray cloud) instead of “Proxied” (orange cloud) for Minecraft to work.
Step 3: Test the Connection
DNS changes take 5-60 minutes to propagate. Test with:
nslookup -type=SRV _minecraft._tcp.creative.yourdomain.comYou should see output showing the port and target.
In Minecraft:
- Add Server
- Server Address:
creative.yourdomain.com(no port!) - Hit Refresh
Minecraft will automatically query the SRV record and connect to the right port.
What I Learned / Gotchas
Subdomain setup first. Some DNS providers require you to create the subdomain (even as a dummy A record) before allowing SRV records pointing to it. If you get validation errors, add an A record for creative.yourdomain.com first, then add the SRV.
SRV records don’t work on the root domain. You can’t do _minecraft._tcp.yourdomain.com. It has to be a subdomain like _minecraft._tcp.play.yourdomain.com.
TTL (Time To Live) matters. Set a low TTL (like 600 seconds / 10 minutes) while testing. Once everything works, increase it to 3600 or 86400 to reduce DNS query load.
Not all Minecraft clients support SRV. Java Edition fully supports it. Bedrock Edition has spotty support depending on platform (works on Windows 10, unreliable on mobile/console).
Priority and Weight only matter for multiple targets. If you’re just pointing one subdomain to one server, leave Priority at 0 and Weight at 5. These fields are for load balancing or failover setups.
Real-World Example: My Setup
I run three servers on one host:
survival.brandontillman.com→ Port 25565 (vanilla)creative.brandontillman.com→ Port 25566 (creative mode)modded.brandontillman.com→ Port 25567 (FTB modpack)
Players only need to remember the subdomain that matches what they want to play. No ports. No confusion. No “I connected to the wrong server” messages.
Going Further
Dynamic DNS + SRV
If you’re hosting at home without a static IP, use a DDNS service like No-IP or DuckDNS. Point your SRV records to the DDNS hostname:
| Type | Name | Port | Target |
|---|---|---|---|
| SRV | _minecraft._tcp.creative | 25566 | yourhost.ddns.net |
Docker + SRV
Running Minecraft servers in Docker containers? Map each container to a different host port:
- Container 1:
-p 25565:25565 - Container 2:
-p 25566:25565 - Container 3:
-p 25567:25565
Then set up SRV records pointing to the host machine on the mapped ports. Works perfectly with my Docker Bedrock setup.
BungeeCord Alternative
SRV records are simpler than BungeeCord for most hobbyist setups. BungeeCord is overkill unless you need:
- Players to switch servers without disconnecting
- Centralized authentication
- A network lobby system
For just running separate worlds, SRV records are dead simple and maintenance-free.